Blog Archives
WHY RABBITS ARE GREEN
 Rabbits are the greenest livestock you can raise on your homestead! The other day, while I was sifting Bunny Berries, I was thinking that the only by-product of rabbits that is not green are the polypropylene bags that the feed comes in. They aren’t very biodegradable but they are re-usable. I have used them for sandbags, putting wood scraps in for kindling, covering for the outside rabbit hutches in the winter and as small tarps, I have seen many people make some nice re purposed shopping bags and even raincoats from these bags, and then it hit me, I had an idea! I turned them inside out (to have a nice clean white bag) made a stencil and sprayed one side of the bag with BUNNY BERRIES and The other with RISE AND SHINE RABBITRY filled them up with 12+ gallons of the best manure/ fertilizer to sell as bagged manure to local organic gardeners.
But rabbits are also a green choice if you eat meat. So if you are going to eat meat, raising animals at home is the greenest way possible! So for a great sustainable healthy meat supply start raising rabbits today! They’re efficient in the amount of food required for the amount of meat produced compared to other larger livestock. With the larger livestock you are getting into much larger greenhouse gas emissions issues. One doe might have seven or more rabbits, each of which yields 2 to 3+ pounds of dressed meat. So that’s roughly 20 pounds of meat per litter, and a single doe might have three to six litters a year depending on your breeding schedule. Rabbits come in a convenient meal-sized package, so you do not need to use electricity to freeze the extra meat for later use, like you would for larger livestock! Store it on the hoof so to speak.
A domesticated rabbit will eat garden vegetables and even dandelion leaves (Check the FEBURARY archives for SAFE FOOD LIST FOR RABBITS) and so much more! It is possible to raise and feed 2 does and a buck with nothing but what you can produce or find on your own land. Hay is the mainstay of a healthy rabbit diet and is locally grown in most states (You can also grow your own on a small scale). Rabbits also enjoy eating parts of vegetables humans don’t want to consume like carrot tops, radish tops,peelings, and beet tops and much much more. By feeding your rabbits local you can reduce emissions and support the local economy. They’re quiet and won’t disturb the neighbors so no noise pollution.
It may seem mean to kill a rabbit but it is far better than buying an inexpensive, prepackaged steak. Here’s why! Many people don’t think about the environmental impact or an animal’s quality of life when buying processed meat, such as beef and pork from large-scale, crowded, commercial operations that rely on antibiotics and hormones. Rabbits are usually raised locally without medication and antibiotics and can be purchased at a local farmers market thus create less food miles!
Other ways rabbits could be considered green-
The Cages- Can be made out of many green recycled materials such as pallets, reclaimed wood, ect. I use metal cages and they may not be the greenest material when they are made, but the wire cages are built to last. A cage that is well-maintained will last 20+ years. After that, the floor will need replacing but the sides and top are still usable long after the original floor wears out. So that is less in the landfills and less money wasted
Waterers and feeders- Made of plastic, ceramics, and metal and with proper use and care they can be used for decades. Also in a lot of old rabbit books they have ideas to make these items out of recycled metal cans and soda bottles
Waste products- In raising rabbits we do create some waste. Water may be our most wasted product so why not pour the water into a five gallon bucket when adding fresh water and changing out the old water and use it to water your plants (unless you add cider vinegar to your rabbits water), In the winter water is the most wasted. Warm water is still used to thaw out frozen crocks. Frozen water removed from the bowls. On cleaning and sanitizing days we may use an additional 20 gallons . That water is used for irrigation on our pasture and gardens that feed our rabbits. The highest volume waste product that we produce is rabbit droppings, or what we like to call Bunny Berries, Bunny Pearls, or Rabbit Treasures. These are far from a waste product see our post on THE BENIFITS AND USES FOR RABBIT MANURE
See! Rabbits are GREEN!
TANNING RABBIT PELTS
Crème d argent pelt
Rabbit pelts have been used for many years as fur, in the manufacture of felt, and for a variety of miscellaneous toys and other items. With the development of many synthetic fibers and imitation furs, the demand for pelts by furriers has decreased. Today there are few if any market for furs in the United States and is considered a waste product in many a commercial slaughter house.
Whether the pelts from meat slaughtering should be saved and prepared for marketing will depend upon the market demand and value, the type and number of rabbits being slaughtered and the time and facilities available for preparing the pelts. It is unlikely that the small homesteader slaughtering his own rabbits will find it worthwhile to process the skins for sale. But for the homesteader this waste product is a value worth more than just monetary gain but a way toward self sufficiency a wide variety of needed items can be made with rabbit pelts
Rabbit pelts vary widely in quality and value. The different types of fur characteristics vary depending on the breed type, such as the Rex, Satins, Silver Foxes and other fur type breeds(also know as dual purpose rabbits- meat and fur) Pelts from the young of any breed are normally of poor quality and of less value than those from adult animals. The young fryers pelts are thin and can tear, but are still usable but the older rabbits make a stronger finished product. Those with dense winter coat that is not easily removed from the pelt, are most the most sought after.
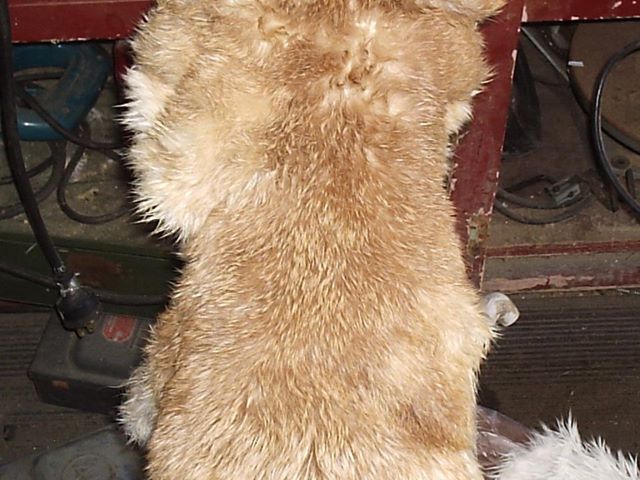
Preparation of pelts for market begins with the removal at slaughter. Exercised care to avoid cuts or tears, and remove body fat that often remains attached to the pelt. As the pelts are removed, turn them inside out while still warm and moist. Place them on wire stretchers or shapers with the front leg casings on one side. Shapers can be made from No. 9 gauge galvanized wire. The shapers extend or expand the pelts to their full length, but do not stretch them out of shape. Fasten the rear legs to the ends of the wire shapers with a clothes pins or some other fastener. Some people split the pelt down the belly. This works great if you are freezing them for later use.(I do this if I am freezing them)
Hang the pelts in a well-ventilated drying area, but not in direct sunlight. After the skins are dry the wire shaper is removed. Do not use salt or other chemicals on skins, but as they are being packed for storage or shipment, naphthalene (moth crystals) or paradichloro-benzene may be placed in the packaging container as an insect repellent.
There are so many ways to tan fur, here is just one of many. Freeze the hides until you have enough to tan (I usally wait till I get 6 or more). I keep them turned inside out. This process is a salt / acid process. This works very well and makes some nice pelts for coats, hats, and my favorite blankets. Wear safety glass and rubber gloves when using this acid mix it is very dilute but will still irritate your eyes.
Tanning Rabbit Pelts
1. After dressing the rabbit, toss the raw hide (split down the belly, not cased) into a Ziploc bag and put it into the freezer. Do not salt or dry out, you don’t even have to flesh them either. When you have 6 or more, you’ll have enough to make it worth your while to tan.
2. Thaw out the frozen hides, run under warm water to remove ice.
3. Rinse well and squeeze out excess water – DO NOT WRING THEM!!! SQUEEZE ONLY!!
4. You will need: 1PLASTIC 5 GALLON BUCKET
2 LBS. ROCK SALT(OR ANY CHEAP SALT)
8OZ . BATTERY ACID (can get at any Automotive store and is cheap)
STICK OR WOODEN SPOON – for stirring
A SCRUBBED BRICK OR ROCK to hold the pelts from rising to the surface of the solution.
There are many other pickle solutions. I have use this method and am happy with it!
5. Run 1 gallon of HOT water into the bucket, add salt and stir to dissolve. Add 1 gallon of cool water (not cold). Water temp. should be about 70 degrees.
6. Slowly add acid by tipping the bucket toward you and allowing the acid to dribble down the inside into the water. Be careful not to splash liquid and stir carefully with a non-metallic spoon or stick till blended. You may want to wear rubber gloves for this. ALWAYS WEAR EYEPROTECTION! Remember the old saying when using acid and water “Water to acid prepare to be blasted” ALWAYS add the acid to water slowly not the other way around!!
7. Lower the completely thawed hides one at a time into the bucket. Submerge in liquid with the stick and slide brick or rock down the bucket upright and allow the rock or brick to settle on top to the hides. At this stage the acid is not strong enough to do any real damage to your skin but you don not want to splash it into your eyes!
8. Put a piece of plywood on top of the bucket and stash away in the garage or closet where no one will disturb it or get into it. Make sure that wherever you put it, it will stay at approx. 70 degrees. Too hot and the hides will be damaged, too cold and the tanning process will be delayed.
9. Leave the bucket alone for 1 week. Put your rubber gloves on then gently remove hides from the acid solution with the stick. Allow them to drip over the bucket then SQUEEZE to remove excess liquid. Do not take to the sink. Run under cool water and add dish detergent to remove the remaining acid mixture. Rinse and squeeze out.
10. At this point the flesh on the underside of the hide should be thickened and somewhat separated from the hide. Grasp a piece on the edge and you should be able to simply peel the flesh off, often all in one piece. Be very careful with junior hides, as they tend to be very thin and easy to tear. If the flesh is very tight on the hide, it isn’t “prime” yet and should be returned to the acid solution for a few more days.
11. After fleshing, return the hides to the acid solution and leave for another week (can be safely left for up to a year).
12. When you pull out the hides after at least a week, remove the pelts and swish them around in soapy water. Squeeze as much water out as possible. Now lay pelts over the porch railing, back step, or make a drying rack to allow the pelts to drip dry. At the first sign of drying (white patches on the flesh side), work the hides gently over the back of a chair, 2X4, fence post, rough rope ect. pulling the pelt back and forth and then pull gently till the flesh side turns white all over. Pelts can be thrown in a very cool clothes dryer and tumbled for a while to help the drying/softening process.
13. Once the hides are worked till soft and completely dry this takes LOTS OF ELBOW GREASE! If you have allowed the pelts to dry stiff without working them, toss them in a pan of water to soften and then start over with the drying/working process. It doesn’t take more than a few minutes each to work the hides to a nice suede like softness. Rub the fur side over the back of a chair also to make the fur soft and natural looking. After you are done with the tanning solution, add a couple cups of baking soda to neutralize the acid. This makes it completely safe to dispose of. Good luck!!! Let me know how you do!
I am currently writing up a post on NATURALLY TANNING RABBIT PELTS so stayed tuned. JOIN THE RABBIT REVOLOUTION! Like us on Facebook and subscribe to our blog to get all the newest post as they are posted!
