Blog Archives

NOSE TO TAIL-Uses For Every Part Of The Domestic Rabbit
I am a big fan of using every part of an animal. It’s not so much about frugality but that I feel a need to not waste anything and respecting the animal we raise and eat. It is sometimes a challenge to figure out what to do with a whole animal and using all its parts.
I have found that learning how to butcher and use all the parts of a rabbit is a good way to start. Rabbit is the best livestock to begin with butchering! It is usually easy to find readily available, small enough to handle, and its anatomy scales up to the anatomy of a pig, lamb, or goat. If you can butcher a rabbit, you can butcher the bigger animals, too! The cuts are very much the same, just a easier to handle.
I make many different dishes out of my rabbits, it is a tasty way to use the entire animal. The front legs make great buffalo wings for a great appetizers, the bones, head and ribs can be boiled for stock, and the rest of the rabbit can be roasted, baked, braised, and barbequed. There is SO much you can do with rabbit!
From a Green standpoint, if you look at the amount of land, food, and time it takes to raise large animals like lamb, pigs, cows, and goats you see that rabbit is a easy sustainable item that’s healthy, versatile, and not expensive, especially when you buy it whole or raise it yourself.
Here are the uses I have found for The Nose To Tail for the rabbit-
The rabbit head and brains are eaten in many countrys, and there are many recipes using both. For example Rabbit Head Pasta http://fxcuisine.com/default.asp?language=2&Display=159&resolution=print and Spicy Sichuan Rabbit Head http://showshanti.com/eating-rabbit-head-tu-tou/, are just a few, but heads are traditionally used in stews and stocks. Dog owners feeding their pets a raw food diet say their dogs love the heads and I have also seen them fed to pigs. The head can be crushed and fed to the chickens, the blood, bones, and meat is considered good for the laying hen, and blood mixed in the mash can be used for the same purpose. In Europe rabbits are sold with the head on, this is cooked or used for soup stock.
The brains can also be used for brain tanning the pelt. It is said that the size of every animals brain is enough to tan that animal’s pelt.
The ears of the rabbit can be dehydrated and used for dogs treats. My dogs LOVE these. There are also recipes for rabbit ears, such as deep-fried rabbit ears served with an apricot ginger chutney sauce. http://www.hungryinhogtown.com/hungry_in_hogtown/2007/03/earresistible_e.html
The pelts of the rabbit can be used to make blankets, hats, and many other assorted clothing to keep warm or as a added fur fringe to clothing for a fancy look. https://riseandshinerabbitry.com/2012/01/22/tanning-rabbit-pelts/
The bones, heads, and ribs can be boiled and used to make a great tasting stock and rabbit gravy. http://stefangourmet.com/2013/10/27/rabbit-stock/ http://www.youtube.com/watch?v=1hI-MrT2OOc
The heart, kidneys, and livers are very nutritious and tasty, to eat alone or used in a rabbit pot pie, or for stuffing and sausage, there are also lots of recipe’s available for these.
The Lungs though fine for human consumption, no chef, or farmer we spoke with had heard of using rabbit lungs in cuisine. But I have dried them with the ears, and sometimes the liver (cut into pieces to be dried) for dog treats! Or you could just feed them fresh to your dogs.
The blood of the rabbit can be used to make blood sausage, and blood pudding. http://www.backwoodsbound.com/zrabbit14.html Rabbit Blood Pudding Recipe
Rabbit blood can be used to thicken sauces and make charcuterie. If you do not want to eat the blood you can mix it with sawdust and it makes a great soil additive or add to the compost. You can also mix the blood in chicken feed for that extra protein.
The offal guts and other left over butchering scraps can be fed to dogs, cats, pigs, or also put in the compost pile.
Rabbit offal (the guts, internal organs, and non-flesh soft parts) are prized food in some cultures. They can be ground with a household meat grinder and used to make sausage, haggis, pate’, or other tasty tidbits.
My first choice for anything I am not going to use is to feed to carnivores. Most zoos, fur farms, hunters or even your own pets will happily take it off your hands. A pig would probably eat it. My Muscovy ducks and chickens will run to the offal piles at butchering time trying to get some scraps!
If you have a lake, pond or even raising fish in a aquaponics setup a good second choice is to put the offal in wire baskets above the surface of the water. The insects will eat the offal, then they themselves or their maggots fall into the water and feed your fish or crawfish. You could do this and collect the maggots and feed them to your chickens. You may want to do this away from the house as this will stink!http://www.themodernhomestead.us/article/feeding-chickens-maggots.html
Third choice is your compost pile with some management insect nuisance, odor, and animal attraction is no problem. The problem with rabbit parts is that they decompose slowly. The moisture and the heat of a compost pile works well for the breakdown of vegetable matter, but in the case of animal parts it can attract maggots! Because of this slow decomposition this can also offers a place for unhealthy bacteria and rodents. By tossing a handful or two of lime on the rabbit parts this will help speed the decomposition. Cover the rabbit parts with a good amount of sawdust or shavings. Then compact this down tightly. This will reduce the odors. Have strong, tall sides to your compost pile (I use pallets) and cover the top with a tarp. This is further protection against animals getting into your pile. So the next time you have rabbit products to dispose of, use your compost heap.
The rabbit feet can be used with the offal or made into lucky rabbits feet by drying and adding some beads or other decorative items for some really cool looking charms. You can make these by putting some 70% isopropyl rubbing alcohol in a small jar with the rabbits feet completely submerged in the alcohol, soak for 2 days this will lock in the fur. It also dehydrates the cells and kills bacteria and fungus. After the 2 days take out and rinse with water, you will need some borax this can be found in the laundry sections in most grocery stores. Using another jar or you may empty, rinse, and dry the jar you used earlier. Now mix some borax and water to about a 15 to1 mix use hot water as it will help the borax to dissolve. The borax will help to dehydrate skin and tissue helping to preserve the foot, also has antibacterial and antifungal properties. Make sure to submerge the feet in this mixture for one day. After one day in the borax mix I take out a put the feet in the sun to dry. Brush clean and you are ready to decorate with beads, and a end cap there are so many ways to dress up your new lucky charm. My wife dyes fiber with Kool Aid and white vinegar I want to try this with some of the white rabbits feet.
The rabbit’s tail has been used for many centuries for pollinating flowers, by attaching the tail to a stick and going from the male flower to the female flower transferring pollen in hoop houses and greenhouses. You could also use these as charms.
These are the uses I have found for using the rabbit from Nose To Tail, if you know of any more please let me know and I will add to this post!
TANNING RABBIT PELTS
Crème d argent pelt
Rabbit pelts have been used for many years as fur, in the manufacture of felt, and for a variety of miscellaneous toys and other items. With the development of many synthetic fibers and imitation furs, the demand for pelts by furriers has decreased. Today there are few if any market for furs in the United States and is considered a waste product in many a commercial slaughter house.
Whether the pelts from meat slaughtering should be saved and prepared for marketing will depend upon the market demand and value, the type and number of rabbits being slaughtered and the time and facilities available for preparing the pelts. It is unlikely that the small homesteader slaughtering his own rabbits will find it worthwhile to process the skins for sale. But for the homesteader this waste product is a value worth more than just monetary gain but a way toward self sufficiency a wide variety of needed items can be made with rabbit pelts
Rabbit pelts vary widely in quality and value. The different types of fur characteristics vary depending on the breed type, such as the Rex, Satins, Silver Foxes and other fur type breeds(also know as dual purpose rabbits- meat and fur) Pelts from the young of any breed are normally of poor quality and of less value than those from adult animals. The young fryers pelts are thin and can tear, but are still usable but the older rabbits make a stronger finished product. Those with dense winter coat that is not easily removed from the pelt, are most the most sought after.
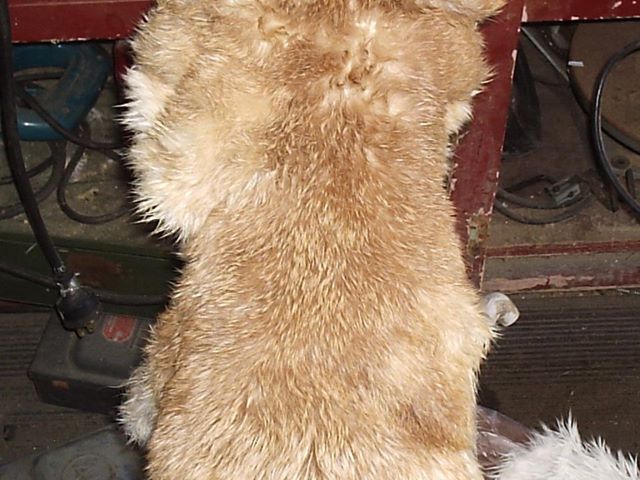
Preparation of pelts for market begins with the removal at slaughter. Exercised care to avoid cuts or tears, and remove body fat that often remains attached to the pelt. As the pelts are removed, turn them inside out while still warm and moist. Place them on wire stretchers or shapers with the front leg casings on one side. Shapers can be made from No. 9 gauge galvanized wire. The shapers extend or expand the pelts to their full length, but do not stretch them out of shape. Fasten the rear legs to the ends of the wire shapers with a clothes pins or some other fastener. Some people split the pelt down the belly. This works great if you are freezing them for later use.(I do this if I am freezing them)
Hang the pelts in a well-ventilated drying area, but not in direct sunlight. After the skins are dry the wire shaper is removed. Do not use salt or other chemicals on skins, but as they are being packed for storage or shipment, naphthalene (moth crystals) or paradichloro-benzene may be placed in the packaging container as an insect repellent.
There are so many ways to tan fur, here is just one of many. Freeze the hides until you have enough to tan (I usally wait till I get 6 or more). I keep them turned inside out. This process is a salt / acid process. This works very well and makes some nice pelts for coats, hats, and my favorite blankets. Wear safety glass and rubber gloves when using this acid mix it is very dilute but will still irritate your eyes.
Tanning Rabbit Pelts
1. After dressing the rabbit, toss the raw hide (split down the belly, not cased) into a Ziploc bag and put it into the freezer. Do not salt or dry out, you don’t even have to flesh them either. When you have 6 or more, you’ll have enough to make it worth your while to tan.
2. Thaw out the frozen hides, run under warm water to remove ice.
3. Rinse well and squeeze out excess water – DO NOT WRING THEM!!! SQUEEZE ONLY!!
4. You will need: 1PLASTIC 5 GALLON BUCKET
2 LBS. ROCK SALT(OR ANY CHEAP SALT)
8OZ . BATTERY ACID (can get at any Automotive store and is cheap)
STICK OR WOODEN SPOON – for stirring
A SCRUBBED BRICK OR ROCK to hold the pelts from rising to the surface of the solution.
There are many other pickle solutions. I have use this method and am happy with it!
5. Run 1 gallon of HOT water into the bucket, add salt and stir to dissolve. Add 1 gallon of cool water (not cold). Water temp. should be about 70 degrees.
6. Slowly add acid by tipping the bucket toward you and allowing the acid to dribble down the inside into the water. Be careful not to splash liquid and stir carefully with a non-metallic spoon or stick till blended. You may want to wear rubber gloves for this. ALWAYS WEAR EYEPROTECTION! Remember the old saying when using acid and water “Water to acid prepare to be blasted” ALWAYS add the acid to water slowly not the other way around!!
7. Lower the completely thawed hides one at a time into the bucket. Submerge in liquid with the stick and slide brick or rock down the bucket upright and allow the rock or brick to settle on top to the hides. At this stage the acid is not strong enough to do any real damage to your skin but you don not want to splash it into your eyes!
8. Put a piece of plywood on top of the bucket and stash away in the garage or closet where no one will disturb it or get into it. Make sure that wherever you put it, it will stay at approx. 70 degrees. Too hot and the hides will be damaged, too cold and the tanning process will be delayed.
9. Leave the bucket alone for 1 week. Put your rubber gloves on then gently remove hides from the acid solution with the stick. Allow them to drip over the bucket then SQUEEZE to remove excess liquid. Do not take to the sink. Run under cool water and add dish detergent to remove the remaining acid mixture. Rinse and squeeze out.
10. At this point the flesh on the underside of the hide should be thickened and somewhat separated from the hide. Grasp a piece on the edge and you should be able to simply peel the flesh off, often all in one piece. Be very careful with junior hides, as they tend to be very thin and easy to tear. If the flesh is very tight on the hide, it isn’t “prime” yet and should be returned to the acid solution for a few more days.
11. After fleshing, return the hides to the acid solution and leave for another week (can be safely left for up to a year).
12. When you pull out the hides after at least a week, remove the pelts and swish them around in soapy water. Squeeze as much water out as possible. Now lay pelts over the porch railing, back step, or make a drying rack to allow the pelts to drip dry. At the first sign of drying (white patches on the flesh side), work the hides gently over the back of a chair, 2X4, fence post, rough rope ect. pulling the pelt back and forth and then pull gently till the flesh side turns white all over. Pelts can be thrown in a very cool clothes dryer and tumbled for a while to help the drying/softening process.
13. Once the hides are worked till soft and completely dry this takes LOTS OF ELBOW GREASE! If you have allowed the pelts to dry stiff without working them, toss them in a pan of water to soften and then start over with the drying/working process. It doesn’t take more than a few minutes each to work the hides to a nice suede like softness. Rub the fur side over the back of a chair also to make the fur soft and natural looking. After you are done with the tanning solution, add a couple cups of baking soda to neutralize the acid. This makes it completely safe to dispose of. Good luck!!! Let me know how you do!
I am currently writing up a post on NATURALLY TANNING RABBIT PELTS so stayed tuned. JOIN THE RABBIT REVOLOUTION! Like us on Facebook and subscribe to our blog to get all the newest post as they are posted!
